


|
|
Hour by Hour, Nut by Nut
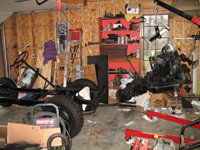
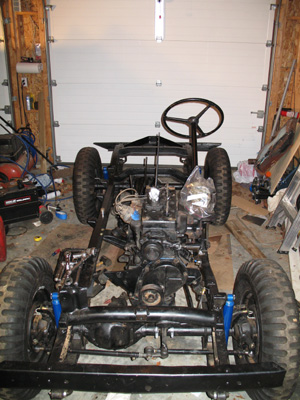
With dogged persistence, Ole Blue is finally beginning to look like a jeep, instead of just a pile of parts. Circumstances, including family and job commitments have meant that we can only grab a few hours every now and then to work on the Blue. But for us, there are signs of spring and of major progress.
Steering in the right direction
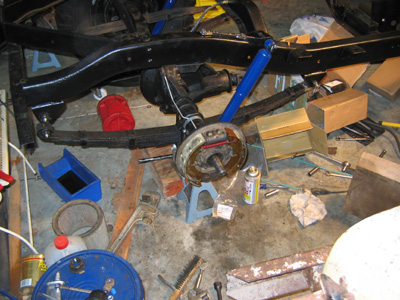
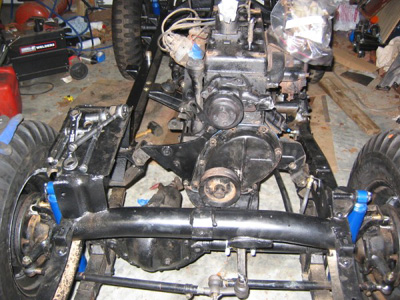
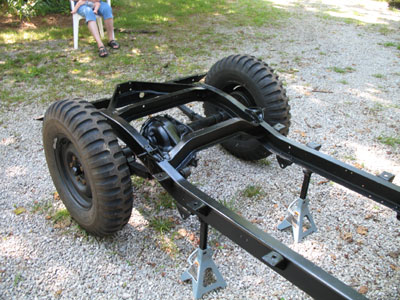
First goal, get the jeep back together. Second goal, make it save to drive on the road. Among the first of many boxes of parts to arrive at the farm where new tie rod ends, bell crank and drag link repair kits. This part was pretty straight forward and with the return of the steering column, we reached a minor milestone. We now had a rolling, steer able chassis!
Braking up is hard to do
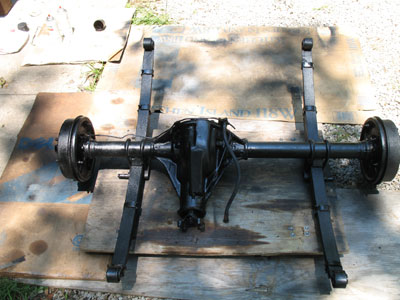
Having done a “brake job” on the yellow jeep, we assumed this would be pretty straight forward. While we had debated the merits of a brake upgrade, we chose for now to order all new parts; shoes, cylinders, lines, hoses, master cylinder and clamps. Only the backing plates, drums and brake pedal remained.
As stated, Barry had some experience with jeep brakes (http://www.oldfarmjeep.com/cj2a-part4.html). Of course a couple of years had past and a few details were forgotten. This job started off to be much easier. Without a body and drive train in the way, running new lines was a snap. Having purchased pre-formed brake lines was a great investment from Barry’s perspective.
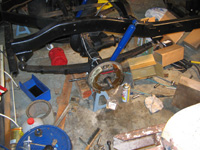
On to taking the hubs off so we can replace the hardware. Remembering that this was a long slow process, we were prepared (we thought) for some grunting, banging and groaning. A couple of hours into the process, we began our (on-line) search for a better way.
What a difference a tool makes
A search of our favorite jeep forums led us to quickly discover that hub removal woes are common. It appears we were just plain lucky the first time around. The “Professional 3-Arm Hub Puller” from J C Whitney was highly recommended. Here is one product review
So we placed our order. And waited. And waited. Apparently lots of people had taken the opportunity to do a brake job and pullers were back ordered.
But it was worth the wait. As soon as it arrived we followed MightMo’s instructions (handy since none came with the puller) and the hub was off in 5 minutes.
The long and short of things
A pair of Willys brake shoes consists of one long and one short shoe. Barry thought he remembered which went in the front. Of course in his job of getting the hub off, he hadn’t paid attention to how parts were installed. But you guessed it. When we pulled the second rear hub (a mere five minute job with our new puller!), the old shoes were installed opposite of what Barry had remembered - and had installed – on the just completed wheel.
Rats. Back to the forums where it was confirmed that Barry was wrong. He was given a couple of “memory” helpers. “Put you best foot (shoe) forward (assuming that bigger is better)” and “Willys has a long face.” We are sure we will remember. But Barry now has had some extra practice at replacing brake shoes.
OH NUTS
The front hubs don’t require a puller, but do require a special socket to fit the large spindle nut. We had acquired the socket for the yellow jeep and quickly removed the outer nut. Note we said outer nut. There are two. Barry had forgotten that detail too. Luckily, Evan figured it out after several minutes of swearing and even applying the puller. There it was. That second nut, hidden in all that bearing grease, came off quickly and so did the hub. Needless to say, the second front hub came off without a hitch.
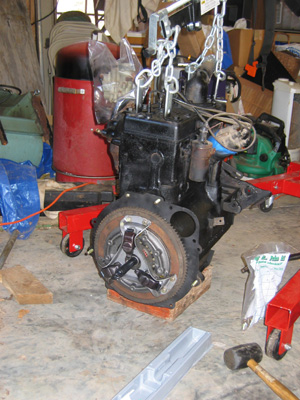
A clutch situation
Blue arrived without an engine. So we knew that we would be adding a new clutch. The loss of both our chief mechanics meant we were heading into a project with no experience and no ready source of advice. After we read the manuals, we determined we need a couple of important items. To figure what size bolts we needed to attach the clutch housing to the flywheel, we purchased/consulted a reproduction Willys parts manual. The version we purchased covers several model and there are reproductions that cover just the 3a. In either case, the parts manual is an excellent addition to any manual collection.
The second purchase was a $2 “clutch alignment tool”. We had to hunt through a few parts stores before finding what we needed. Armed with the alignment tool and the correct bolts, the clutch install was as easy as it will ever be. With both the engine and transmission out of the jeep, we had lots of room to work.
The mating game
Once we installed the clutch, we determined it would be easier to mate the transmission to the engine and install both at the same time. After replacing the throw-out bearing and clutch fork, we used the engine hoist to help us position and align the two parts. Perhaps because of the difference in angle, and the need to go to the hardware store for more bolts, the process took longer than expected. But there we where. Suddenly we had an engine, transmission and transfer case ready to install!
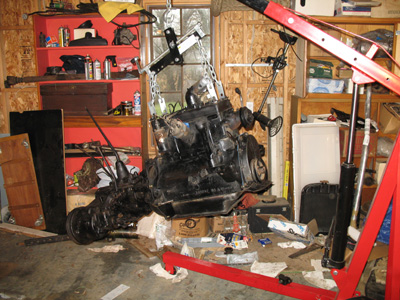
Mountumental problem
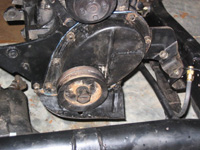
When we purchase our engine from Harry Sheets, he had given us the proper engine mount for a 3a. One reason we were sure the mystery jeep was a 3a was the change in the motor mounts. On the earlier 2a, the mounting “tabs” both faced to the rear. With the 3a, the left side faces forward. The mounting plate bolts to the block, which means removing the timing cover. So before we could get the motor/transmission in the chassis, we had to disassembly the front of the engine.
The proper size socket and an impact wrench was all that was required to remove the crank pulley. When we removed the cover we found a timing chain, rather than gears. So we have an older engine. Not a problem, except we were a little of unsure of the fit of the newer style mount plate. Back to the forums and a quick reassurance that it should work got us searching for a set of gaskets. We found those at Walcks.
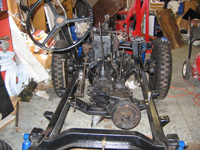
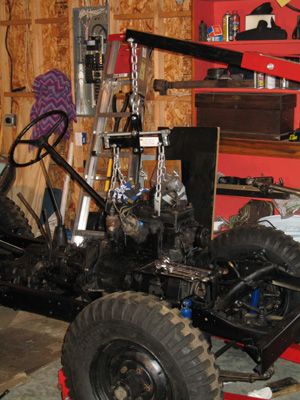
Tab A into slot B
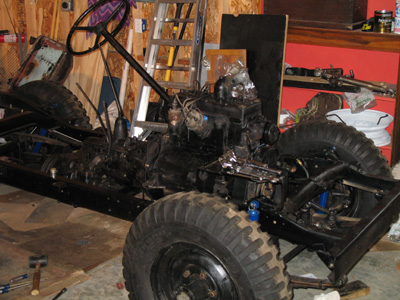
With the new mount in place, all that was left was to insert the motor/transmission/transfer in the waiting chassis. We rolled the chassis from its parking spot to a regular bay. We got to try out the steering, which was great. Using the engine hoist, we raised the drive components and pushed the rolling chassis into place. A push here and there and it was in place! OK, it wasn't quite that simple, but close and we’ve reached another milestone.
Barry’s Notes:
Evan’s
Notes:
|
|


